Chirpy Config - giscus로 댓글 시스템 설정하기
Chirpy Config - giscus로 댓글 시스템 설정하기
Giscus 댓글 시스템 설정하기
이 사이트에서 설정할 수 있습니다.
1. giscus app 사이트에 접속합니다.
2. 언어를 설정합니다.

3. repository가 public으로 등록 되었는지 확인합니다.
4. 블로그 repository에 giscus 앱을 설치합니다.
- 사이트 접근 후
Configure버튼을 클릭해서 블로그 repository만 연결해주세요.
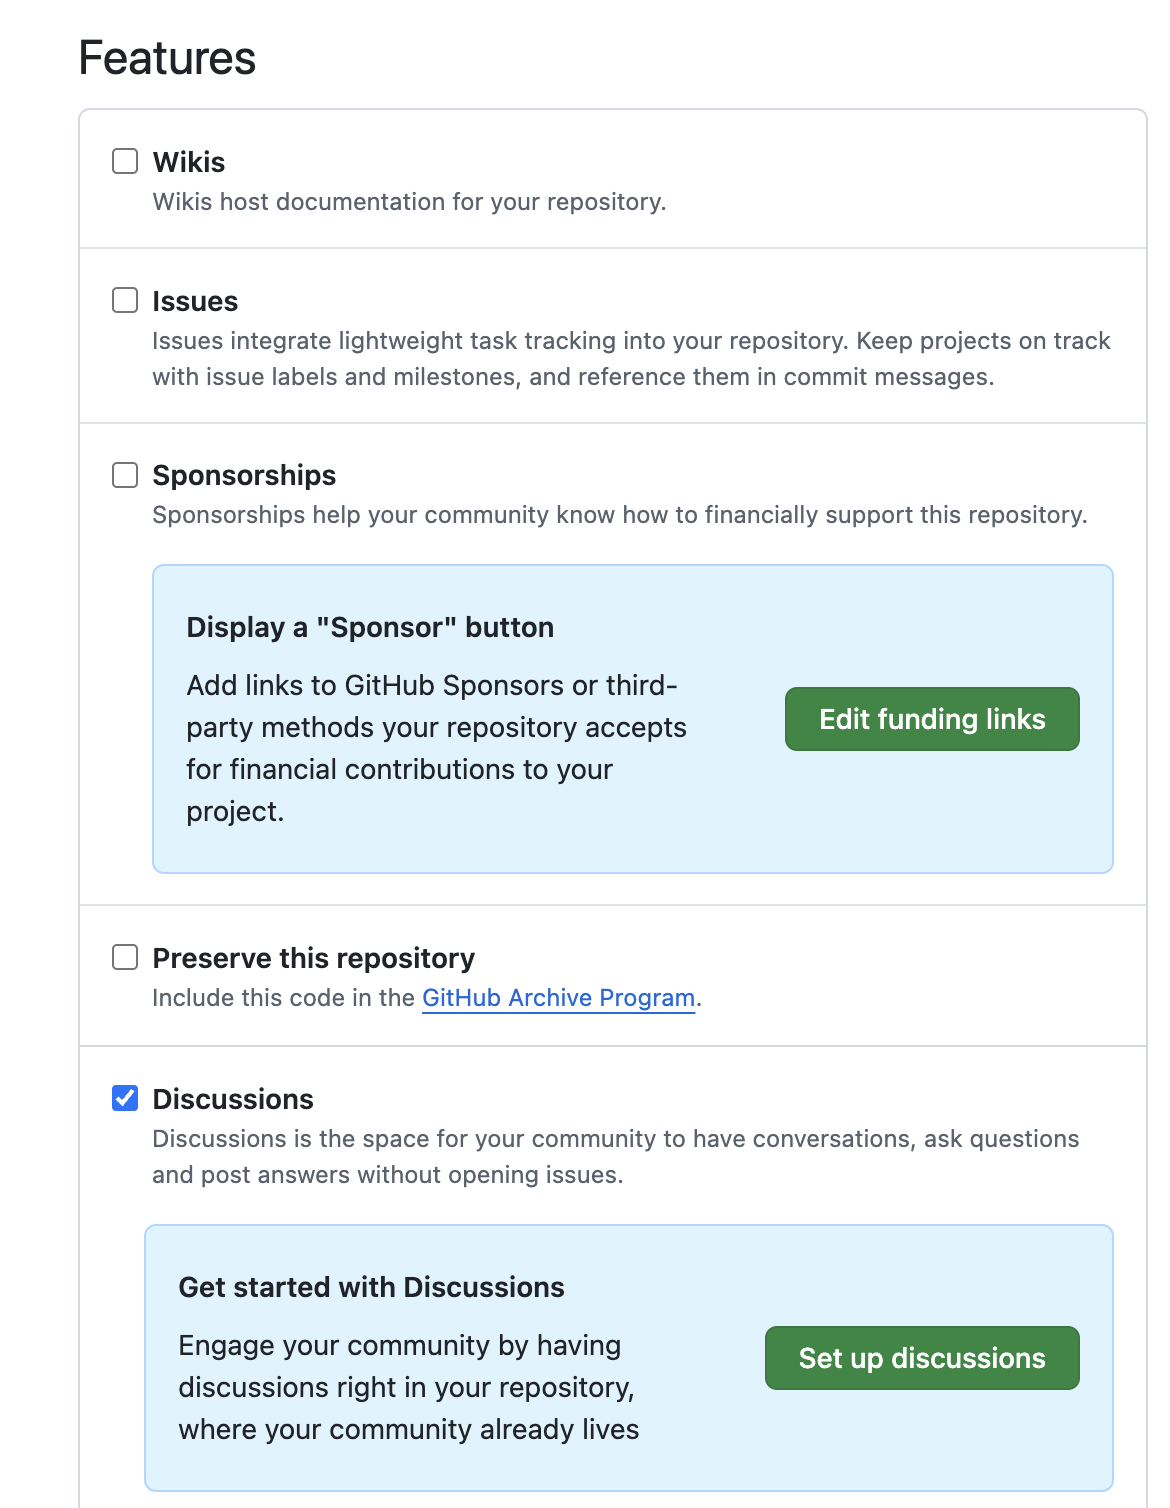
5. repository의 Settings > Generel > Features 항목에서 Discussions를 활성화 합니다.
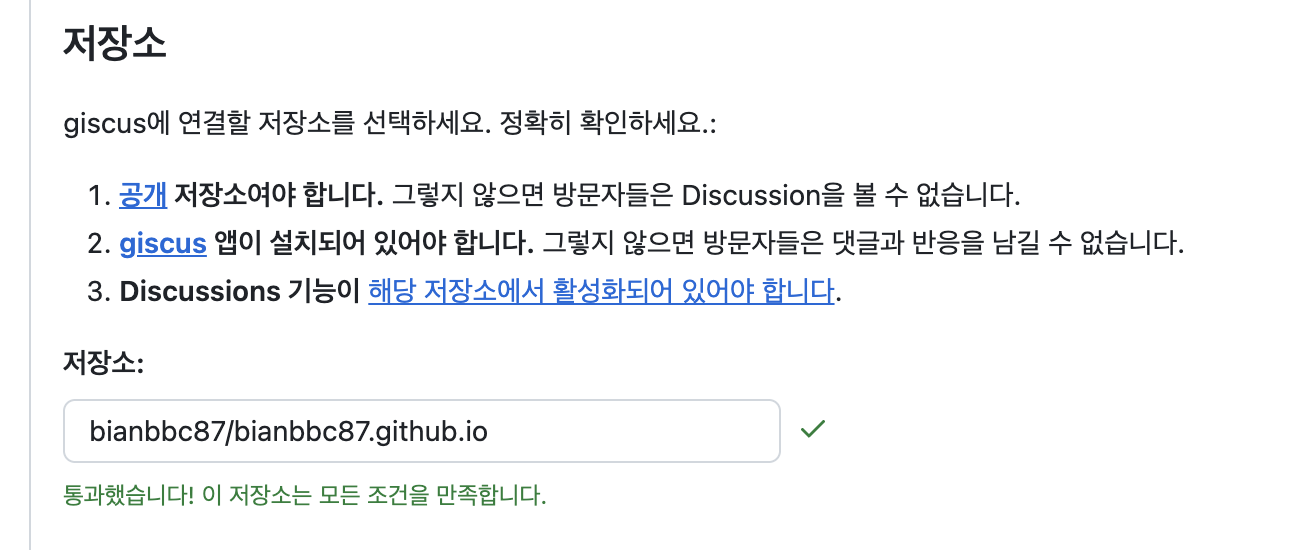
6. 다시 돌아와 저장소명(username/repository)를 새롭게 입력하고 통과를 확인합니다.
7. Discussion 카테고리를 General로 설정합니다.
- 페이지<->Discussions 연결과 기능은 기본 값을 사용합니다.

8. 테마를 선택합니다.

9. giscus 사용에서 보이는 script 중 다음 값만 config에 추가합니다.
1
2
3
4
5
6
7
8
9
10
  giscus:
    repo: ${giscus에 등록한 저장소명}
    repo_id: ${data-repo-id}
    category: ${data-category}
    category_id: ${data-category-id}
    mapping: ${data-mapping} # optional, default to 'pathname'
    strict: ${data-strict} # optional, default to '0'
    input_position: ${data-input-position} # optional, default to 'bottom'
    lang: ${data-lang} # optional, default to the value of `site.lang`
    reactions_enabled: ${data-reactions-enabled} # optional, default to the value of `1`
10. git push로 블로그를 재배포 합니다.
This post is licensed under CC BY 4.0 by the author.