Chirpy Config - Site Verification 등록하기 (with Google, Bing)
Chirpy Config - Site Verification 등록하기 (with Google, Bing)
webmaster_verifications란
블로그 사이트와 포스트를 인증된 검색 엔진에 노출하는 시스템입니다. 검색 엔진 종류는 다음과 같습니다.
- Google: Google 검색 노출
- Bing: Microsoft 검색 노출
- Alexa: 2022년 서비스 종료
- Yandex: 러시아 및 동유럽 검색 노출
- Baidu: 중국 검색 노출
- Facebook - 검색 엔진은 아니지만, Facebook과 Instargram에서 링크를 공유할 때 공식 도메인 인증이 가능하며, Insights 사용이 가능해집니다.
1
2
3
4
5
6
7
webmaster_verifications:
  google: ${google_verifications_code}
  bing: ${bing_verifications_code}
  alexa: # fill in your Alexa verification code
  yandex: # fill in your Yandex verification code
  baidu: # fill in your Baidu verification code
  facebook: # fill in your Facebook verification code
1. Google Site Verification 설정하기
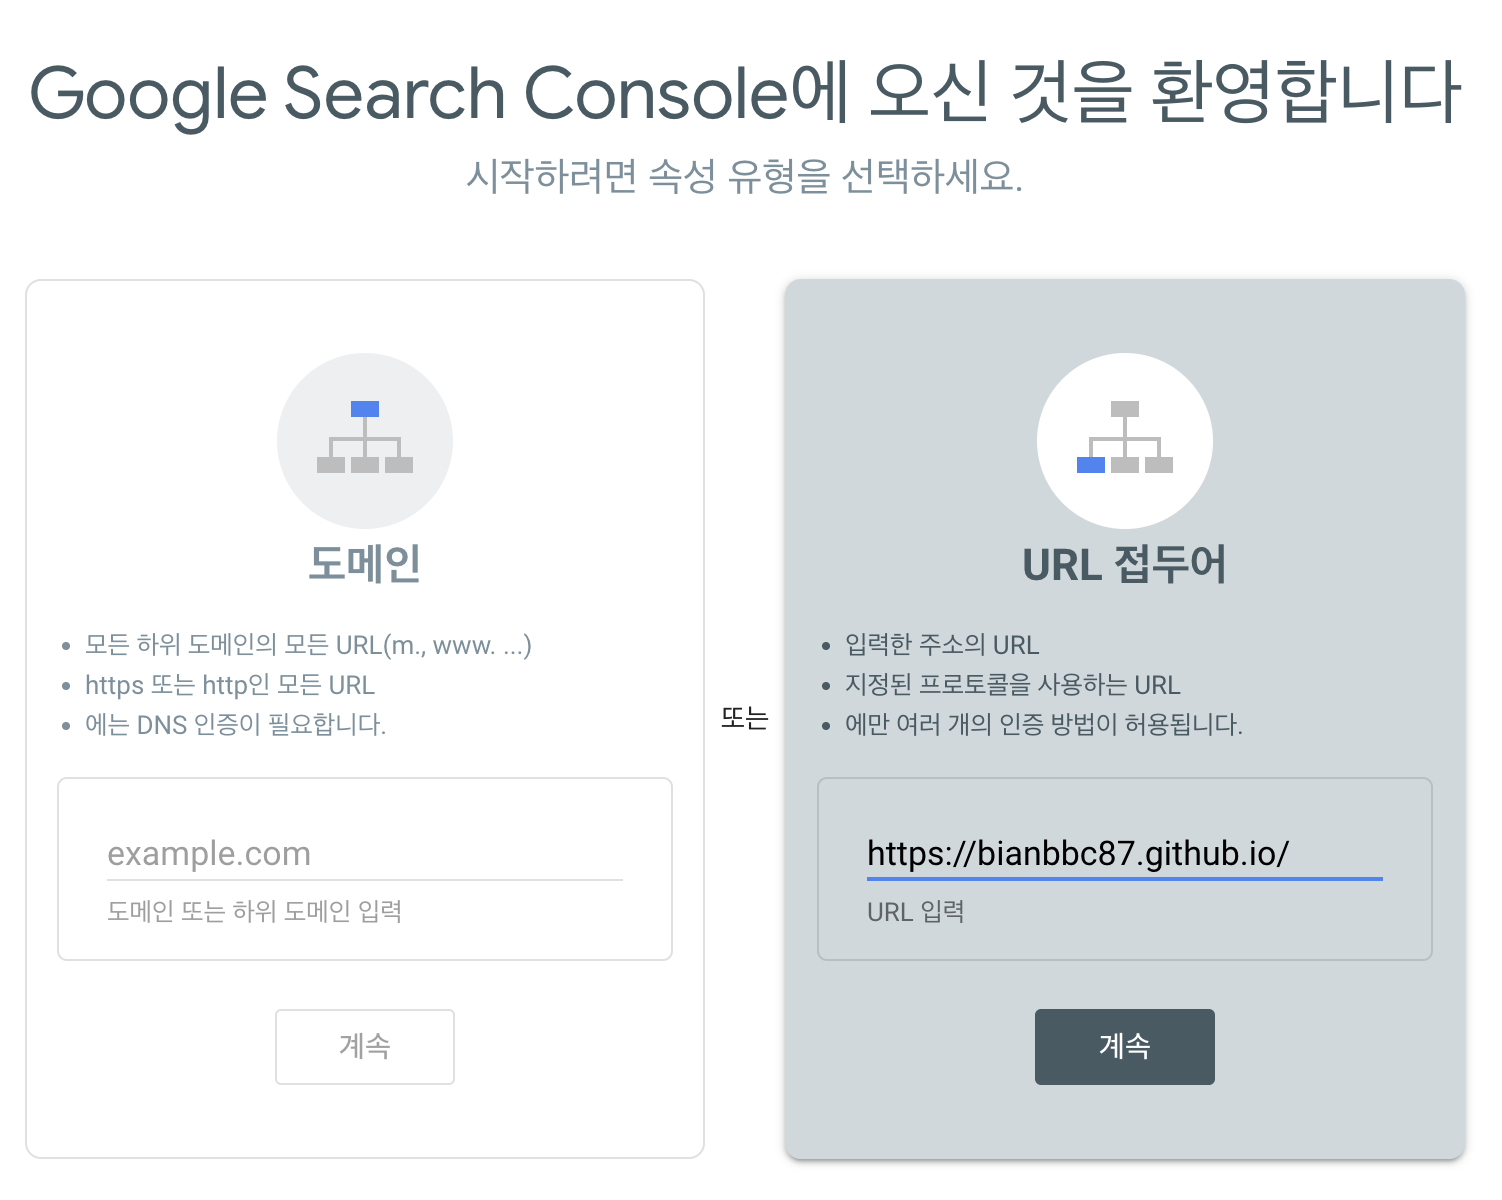
1. Google Search Console로 접속합니다.
2. URL 접두어 방식에 블로그 사이트 도메인을 등록합니다.
3. 권장 확인 방법인 HTML 파일 말고, HTML 태그에서 메타 태그를 복사합니다.
<meta name="google-site-verification" content="R02x0MfSsOobEyxqa11BwJ7oTJvzfBL5jLyTiHwYUZA" /> 에서 content 값
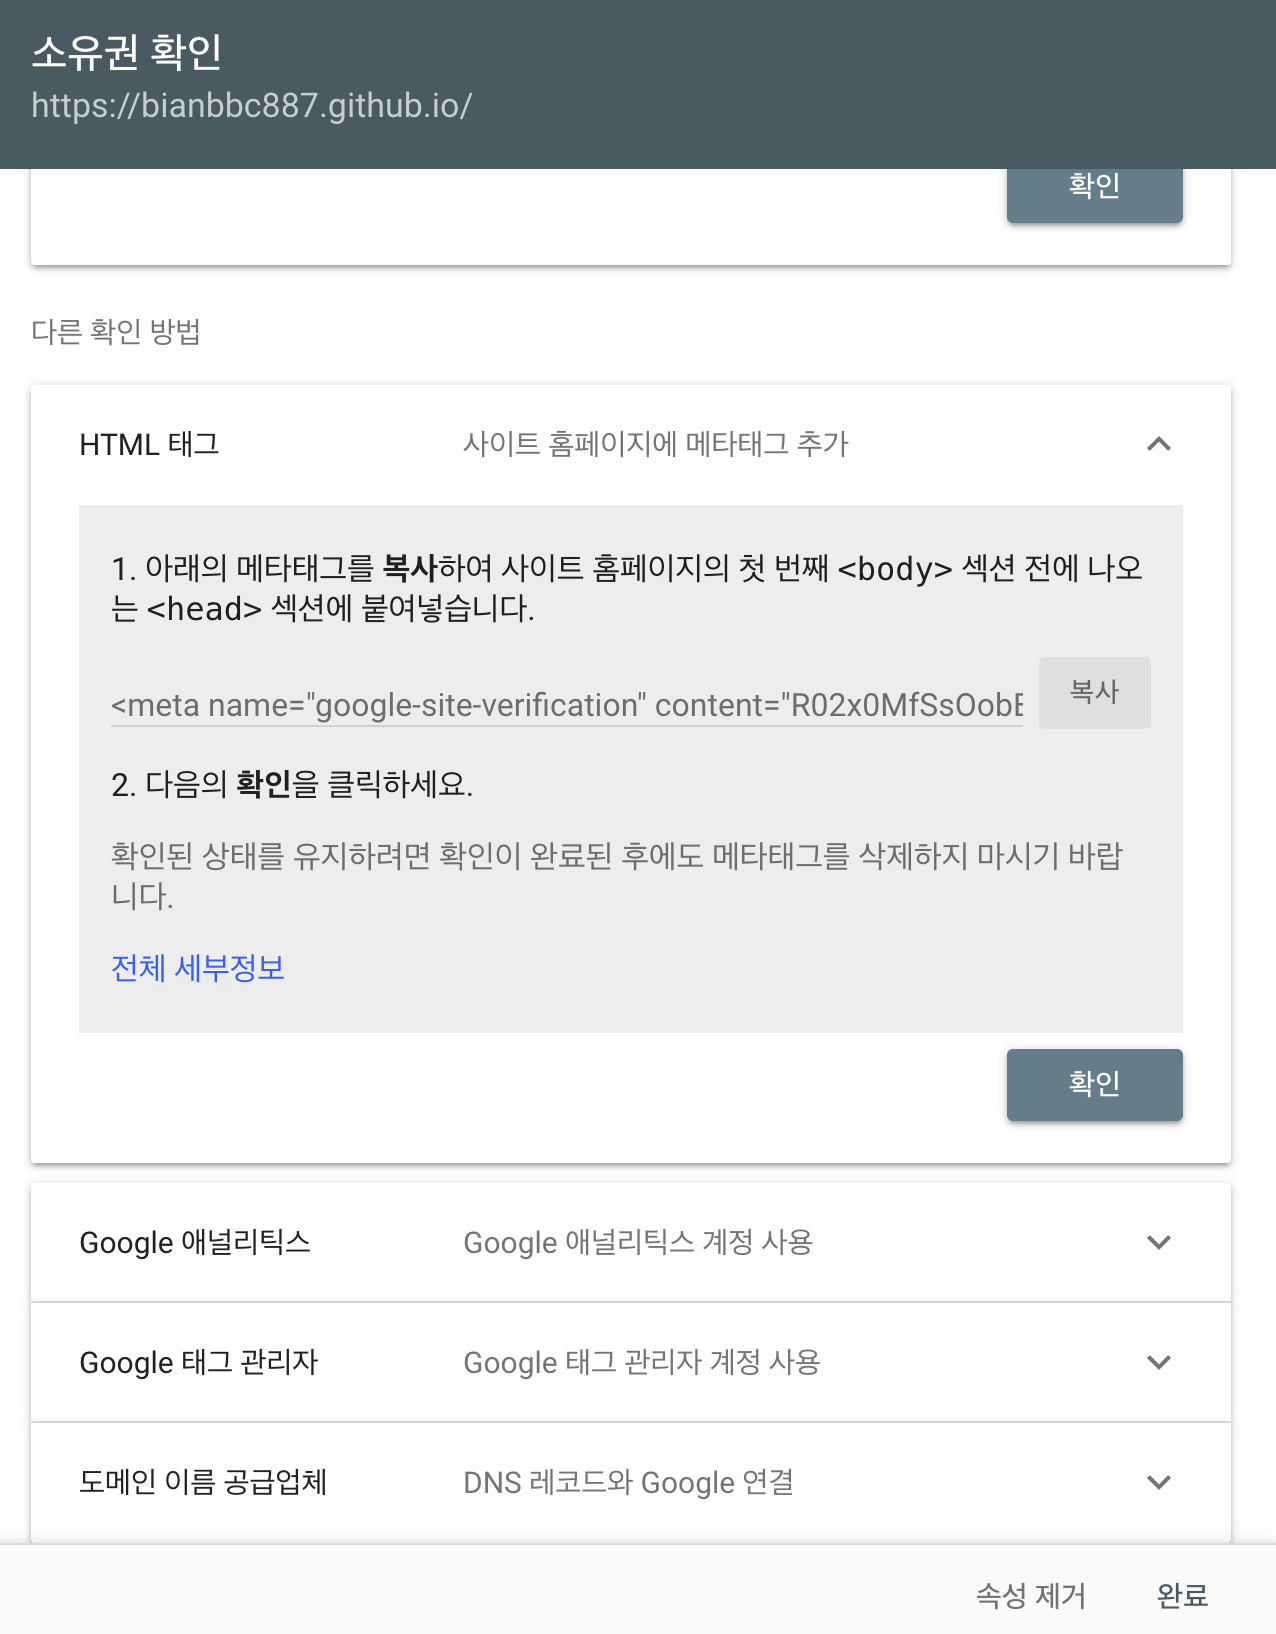
4. ${google_verifications_code} 자리에 붙여넣습니다.
5. 이 설정을 포함한 상태에서 호스팅이 되도록 재배포 합니다. (git push)
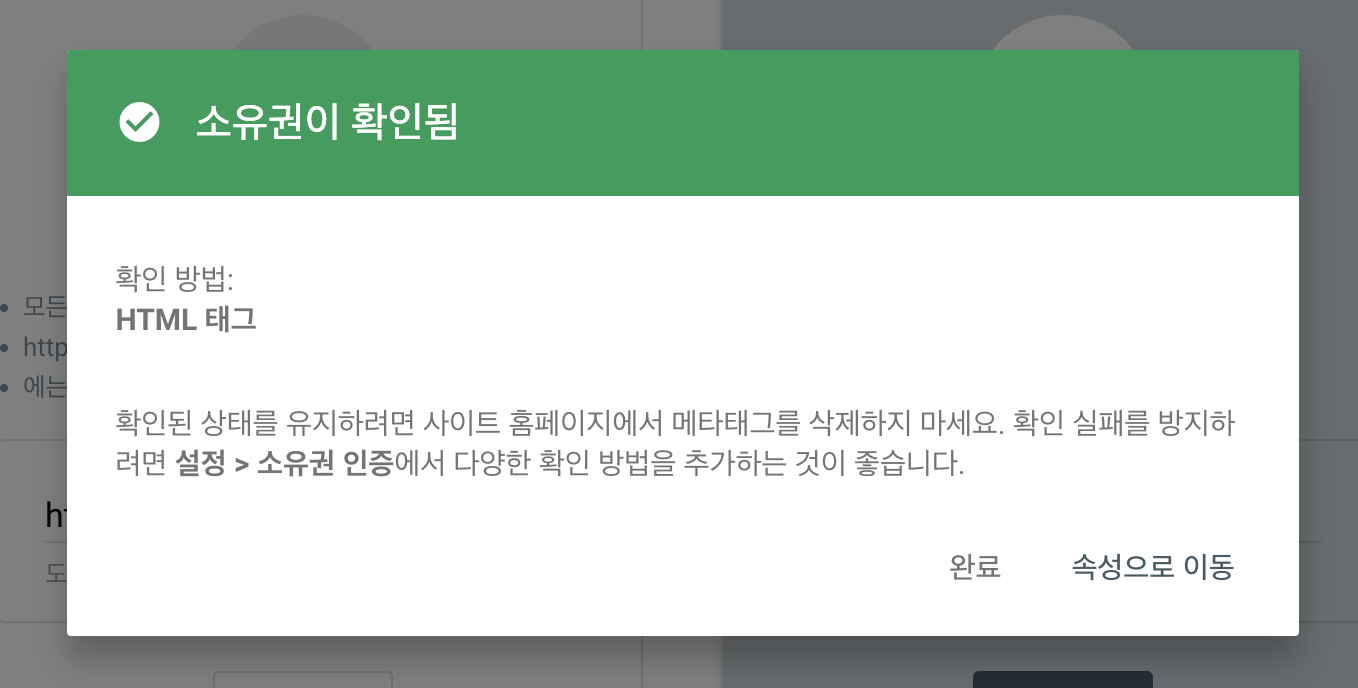
6. 다시 사이트로 돌아와 확인 을 클릭합니다.
7. 성공 화면을 확인합니다.
2. Bing Site Verification 설정하기
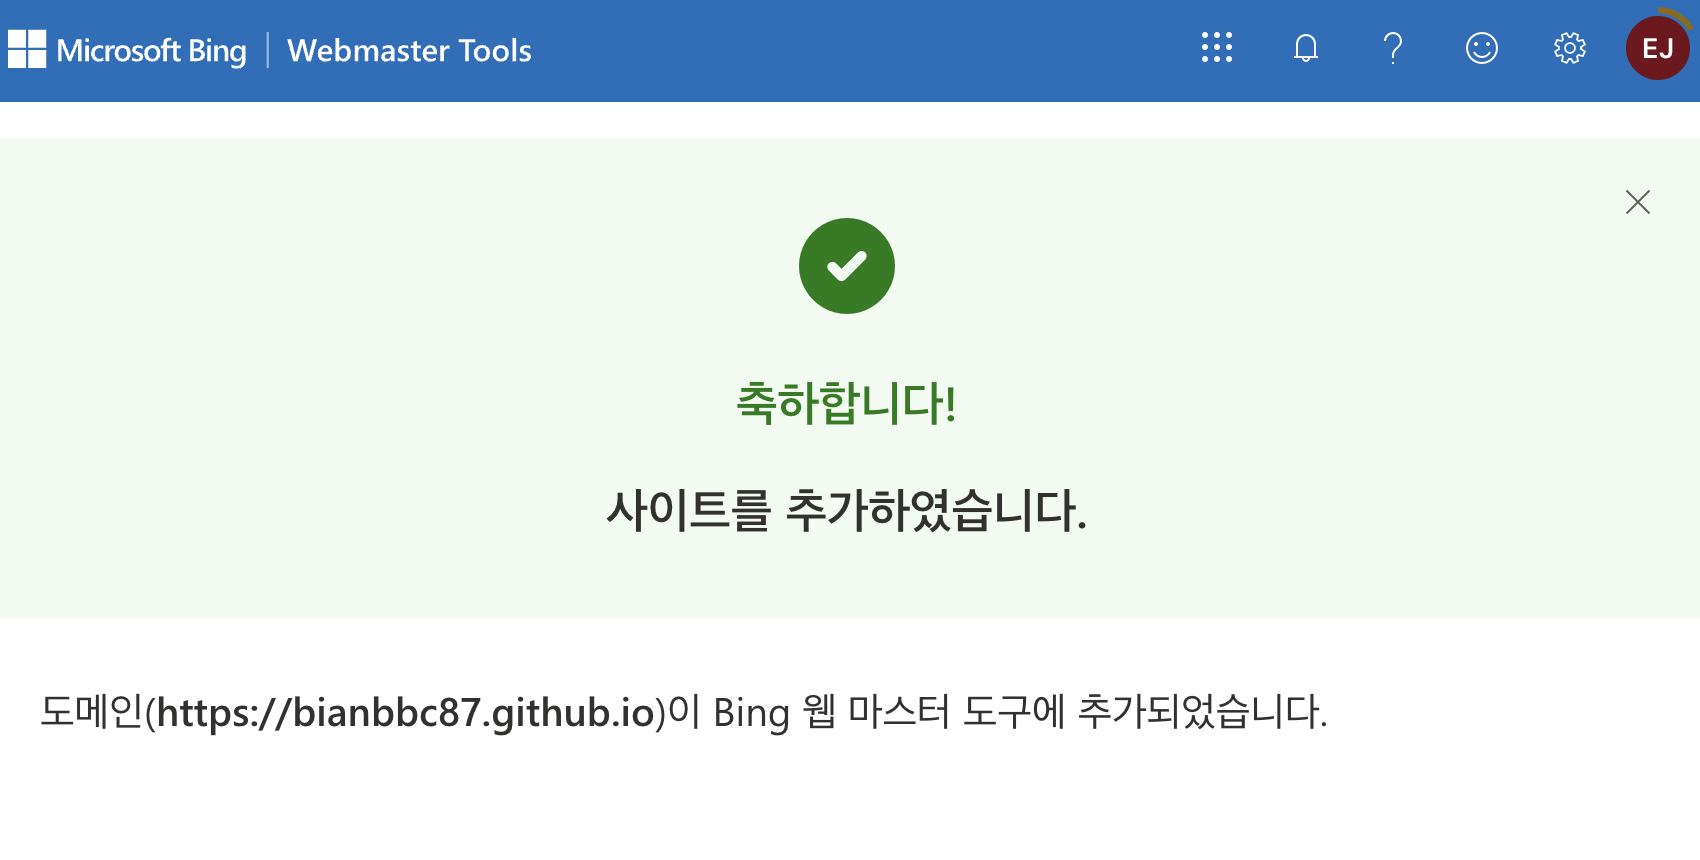
1. Help Guide에 따라 Bing WebMaster에서 인증을 진행하면 됩니다.
2. 성공 화면을 확인합니다.
3. 나머지 설정하기
- Yandex: https://webmaster.yandex.com/
- Baidu: https://ziyuan.baidu.com/
- Facebook: https://business.facebook.com/
This post is licensed under CC BY 4.0 by the author.